A Complete Step-by-Step Guide

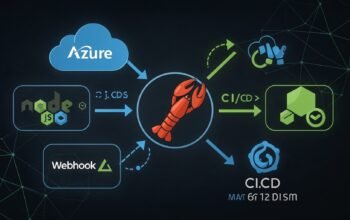
Deploying a Node.js application to Azure doesn’t have to be complicated. Azure Bicep combined with the Azure Developer CLI (azd) provides a streamlined approach to infrastructure as code that’s both powerful and accessible. This guide takes you from zero to production deployment with a complete Node.js web application and PostgreSQL database, using modern Azure tools that eliminate much of the traditional complexity.
Azure Bicep offers a 50% reduction in code compared to ARM templates while maintaining full feature parity, and azd provides a unified workflow that handles provisioning, packaging, and deployment in a single command. Whether you’re migrating from containerized deployments or building cloud-native applications from scratch, this approach delivers consistent, repeatable infrastructure deployments across development, staging, and production environments.
Prerequisites and Setup Essentials
Before diving into Bicep templates, you’ll need the right tools configured properly. The Azure Developer CLI automatically installs both Azure CLI and Bicep CLI, making setup straightforward.
Install Azure Developer CLI
# Windows (using winget)
winget install microsoft.azd

# macOS (using Homebrew)
brew tap azure/azd && brew install azd

# Linux (using curl)
curl -fsSL https://aka.ms/install-azd.sh | bash
Verify Installation and Authenticate
# Check installation
azd version

# Login to Azure
azd auth login

# Set default configurations
azd config set defaults.subscription <your-subscription-id>
azd config set defaults.location eastus
Project Initialization Options
# Start from a template (recommended for beginners)
azd init --template todo-nodejs-mongo

# Initialize from existing code
azd init --from-code

# Create a completely new project
mkdir my-node-app && cd my-node-app
azd init
The azd init command creates the essential project structure including the azure.yaml configuration file and .azure directory for environment management.
Understanding the azd Project Architecture
A well-structured azd project separates concerns clearly, making it easier to manage infrastructure and application code independently. The key is organizing files so infrastructure changes don’t impact application development workflows.
Standard Project Structure
my-app/
├── .azure/                     # Environment configurations
│   ├── config.json            # Global azd settings
│   └── dev/                   # Environment-specific data
│       ├── .env               # Environment variables
│       └── config.json        # Environment configuration
├── infra/                     # Infrastructure as Code
│   ├── main.bicep            # Primary Bicep template
│   ├── main.parameters.json  # Parameter substitution
│   └── modules/              # Reusable Bicep modules
│       ├── app-service.bicep
│       ├── database.bicep
│       └── monitoring.bicep
├── src/                      # Application source code
│   ├── api/                  # Node.js API service
│   └── web/                  # Frontend application
└── azure.yaml               # azd configuration
Configure azure.yaml
name: todo-app
metadata:
  template: todo-app@1.0.0

# Infrastructure configuration
infra:
  provider: bicep
  path: ./infra

services:
  api:
    project: ./src/api
    language: js
    host: appservice

  web:
    project: ./src/web
    dist: build
    language: js
    host: appservice

# Environment management
pipeline:
  provider: github

# Custom deployment hooks
hooks:
  preprovision:
    shell: sh
    run: echo "Starting infrastructure provisioning..."

  postdeploy:
    shell: sh
    run: |
      echo "Application deployed successfully!"
      echo "API URL: ${API_URI}"
      echo "Web URL: ${WEB_URI}"
Building Your First Bicep Template
Bicep templates use declarative syntax to define Azure resources. Start with a simple template and build complexity gradually – this approach prevents deployment errors and makes troubleshooting easier.
Create main.bicep with Essential Parameters
targetScope = 'resourceGroup'

@description('Environment name for resource naming')
@minLength(1)
@maxLength(64)
param environmentName string

@description('Primary location for all resources')
param location string

@description('Database administrator username')
param dbAdminUsername string

@description('Database administrator password')
@secure()
param dbAdminPassword string

// Generate unique resource names
var resourceToken = toLower(uniqueString(subscription().id, environmentName, location))
var appName = 'app-${environmentName}-${resourceToken}'
var dbName = 'db-${environmentName}-${resourceToken}'

// Common tags for all resources
var commonTags = {
  'azd-env-name': environmentName
  Environment: environmentName
  Project: 'node-todo-app'
}
Add App Service Infrastructure
// App Service Plan
resource appServicePlan 'Microsoft.Web/serverfarms@2022-03-01' = {
  name: 'plan-${resourceToken}'
  location: location
  tags: commonTags
  sku: {
    name: environmentName == 'prod' ? 'P1v2' : 'B1'
    capacity: environmentName == 'prod' ? 2 : 1
  }
  kind: 'linux'
  properties: {
    reserved: true // Required for Linux plans
  }
}

// API App Service
resource apiApp 'Microsoft.Web/sites@2022-03-01' = {
  name: '${appName}-api'
  location: location
  tags: union(commonTags, {
    'azd-service-name': 'api' // Required for azd service mapping
  })
  properties: {
    serverFarmId: appServicePlan.id
    siteConfig: {
      linuxFxVersion: 'NODE|18-lts'
      alwaysOn: !startsWith(appServicePlan.sku.name, 'F')
      appSettings: [
        {
          name: 'NODE_ENV'
          value: environmentName
        }
        {
          name: 'DATABASE_URL'
          value: 'postgresql://${dbAdminUsername}:${dbAdminPassword}@${postgresServer.properties.fullyQualifiedDomainName}:5432/${database.name}?sslmode=require'
        }
        {
          name: 'PORT'
          value: '8080'
        }
      ]
    }
    httpsOnly: true
  }
}
Configure PostgreSQL Database
// PostgreSQL Flexible Server
resource postgresServer 'Microsoft.DBforPostgreSQL/flexibleServers@2022-12-01' = {
  name: dbName
  location: location
  tags: commonTags
  sku: {
    name: environmentName == 'prod' ? 'Standard_D2s_v3' : 'Standard_B1ms'
    tier: environmentName == 'prod' ? 'GeneralPurpose' : 'Burstable'
  }
  properties: {
    version: '14'
    administratorLogin: dbAdminUsername
    administratorLoginPassword: dbAdminPassword
    storage: {
      storageSizeGB: environmentName == 'prod' ? 256 : 128
    }
    backup: {
      backupRetentionDays: environmentName == 'prod' ? 30 : 7
      geoRedundantBackup: environmentName == 'prod' ? 'Enabled' : 'Disabled'
    }
    highAvailability: {
      mode: environmentName == 'prod' ? 'ZoneRedundant' : 'Disabled'
    }
  }
}

// Application Database
resource database 'Microsoft.DBforPostgreSQL/flexibleServers/databases@2022-12-01' = {
  parent: postgresServer
  name: 'todoapp'
  properties: {
    charset: 'utf8'
    collation: 'en_US.utf8'
  }
}

// Firewall rule to allow Azure services
resource firewallRule 'Microsoft.DBforPostgreSQL/flexibleServers/firewallRules@2022-12-01' = {
  parent: postgresServer
  name: 'AllowAzureServices'
  properties: {
    startIpAddress: '0.0.0.0'
    endIpAddress: '0.0.0.0'
  }
}
Creating the Node.js Application Structure
Your Node.js application needs specific configurations to work seamlessly with Azure App Service and PostgreSQL. Focus on environment variable handling and database connection management – these are the most common sources of deployment issues.
API Application Structure
// src/api/package.json
{
  "name": "todo-api",
  "version": "1.0.0",
  "main": "app.js",
  "scripts": {
    "start": "node app.js",
    "dev": "nodemon app.js"
  },
  "engines": {
    "node": ">=18.0.0"
  },
  "dependencies": {
    "express": "^4.18.2",
    "pg": "^8.11.0",
    "cors": "^2.8.5",
    "helmet": "^7.0.0",
    "express-rate-limit": "^6.8.1"
  }
}
Main Application File
// src/api/app.js
const express = require('express');
const cors = require('cors');
const helmet = require('helmet');
const rateLimit = require('express-rate-limit');
const { Pool } = require('pg');

const app = express();
const port = process.env.PORT || 3000;

// Security middleware
app.use(helmet());
app.use(cors({
  origin: process.env.ALLOWED_ORIGINS?.split(',') || ['http://localhost:3000'],
  credentials: true
}));

// Rate limiting
const limiter = rateLimit({
  windowMs: 15 * 60 * 1000, // 15 minutes
  max: 100 // limit each IP to 100 requests per windowMs
});
app.use(limiter);

app.use(express.json());

// Database connection
const pool = new Pool({
  connectionString: process.env.DATABASE_URL,
  ssl: process.env.NODE_ENV === 'production' ? { rejectUnauthorized: false } : false
});

// Health check endpoint
app.get('/health', (req, res) => {
  res.status(200).json({
    status: 'OK',
    timestamp: new Date().toISOString(),
    environment: process.env.NODE_ENV
  });
});

// API routes
app.get('/api/todos', async (req, res) => {
  try {
    const result = await pool.query('SELECT * FROM todos ORDER BY created_at DESC');
    res.json(result.rows);
  } catch (error) {
    console.error('Database query error:', error);
    res.status(500).json({ error: 'Internal server error' });
  }
});

app.post('/api/todos', async (req, res) => {
  const { title, description } = req.body;

  try {
    const result = await pool.query(
      'INSERT INTO todos (title, description) VALUES ($1, $2) RETURNING *',
      [title, description]
    );
    res.status(201).json(result.rows[0]);
  } catch (error) {
    console.error('Database insert error:', error);
    res.status(500).json({ error: 'Failed to create todo' });
  }
});

app.listen(port, () => {
  console.log(`Server running on port ${port}`);
  console.log(`Environment: ${process.env.NODE_ENV}`);
});
Complete Deployment Workflow
With infrastructure and application code ready, the deployment process becomes streamlined. azd handles the entire pipeline from infrastructure provisioning to application deployment.
Deploy Your Application
# Complete deployment (provision + deploy)
azd up

# Deploy to specific environment
azd env select prod
azd up --no-prompt

# Individual deployment stages
azd provision          # Infrastructure only
azd deploy             # Applications only
azd deploy api         # Specific service only
Monitor Deployment Progress
# Check deployment status
azd show

# View application logs
azd monitor --logs

# Open Azure portal for detailed monitoring
azd monitor --overview
Conclusion
Deploying Node.js applications to Azure using Bicep and azd creates a foundation for scalable, maintainable cloud applications. The combination of declarative infrastructure and streamlined deployment workflows significantly reduces operational overhead while maintaining flexibility for complex requirements.
Key takeaways include using environment-specific configurations through parameter files, implementing proper monitoring from the start, and leveraging Azure’s managed services for databases and application hosting. The modular approach with Bicep templates ensures your infrastructure code remains maintainable as your application grows.
Start with the basic template provided, deploy to a development environment, then gradually add production features like auto-scaling, enhanced security, and comprehensive monitoring. This incremental approach minimizes risk while building toward a robust production deployment that scales with your application’s needs.